How to hide passwords and secrets
ClipBook detects passwords, API keys, access tokens and card numbers in the text you copy, marks them as sensitive and masks them in your clipboard history. This way nobody can read your secrets when you open ClipBook during a screen sharing session or when someone looks at your screen.
Masked items are shown as a row of dots in the history list and in the preview. Their type icon gets a small green lock, so you can see which items are protected.
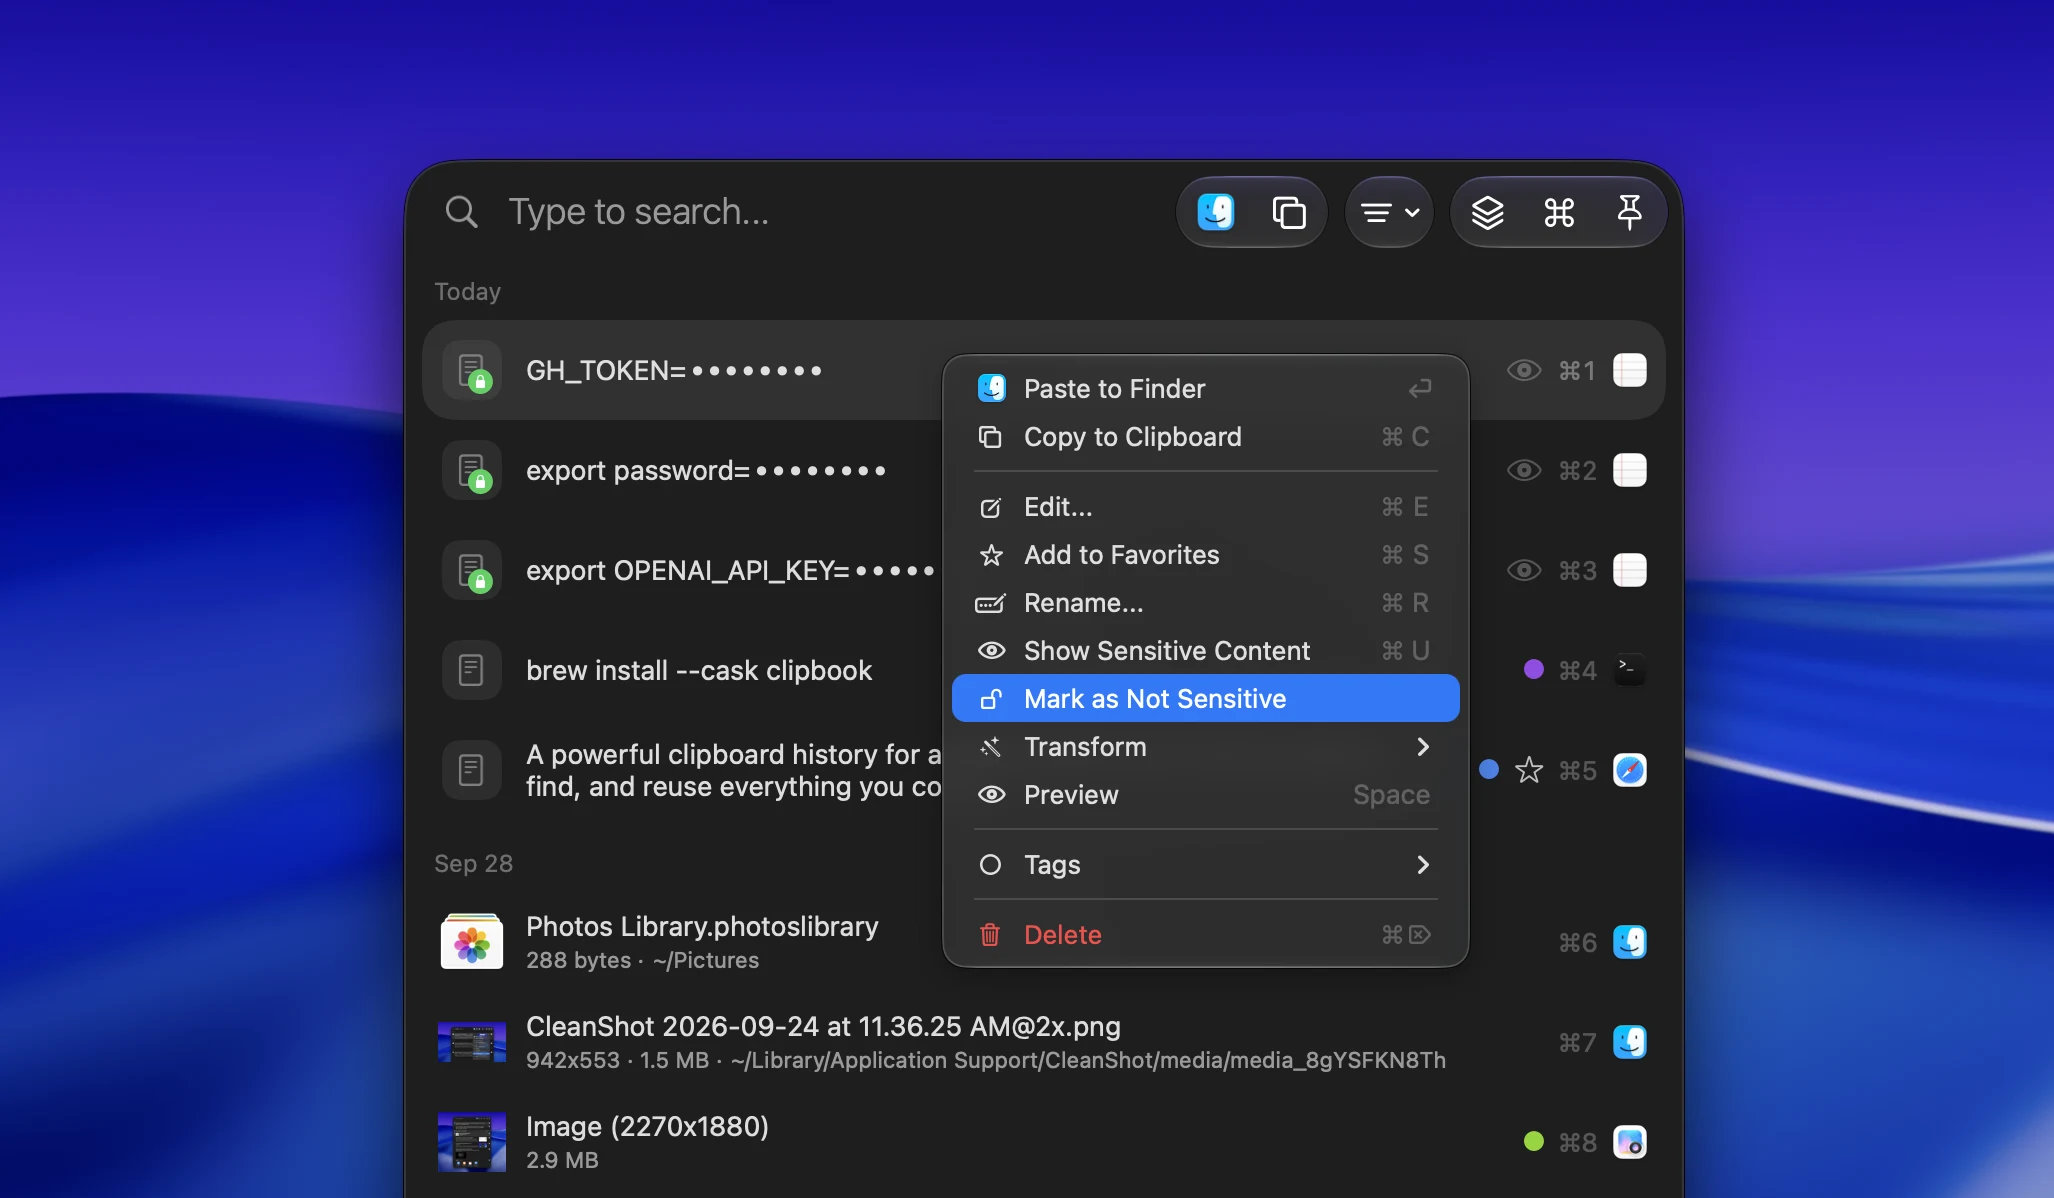
Masking is purely visual. Pasting, copying, dragging and searching always use the original text, so a masked item works exactly like any other.
Show or hide sensitive content
To see what is behind the dots, do one of the following:
- Click the eye icon in the item row.
- Click the eye icon in the preview toolbar.
- Select the item and press ⌘U.
Do the same to hide the content again. The content also gets masked automatically when you hide the clipboard history window.
You can change the default keyboard shortcut in Settings → Shortcuts → Item actions.
Mark an item as sensitive
If ClipBook did not detect a secret in the text you copied, you can hide it yourself. Right-click the text item and select Mark as Sensitive.
If ClipBook masked something that is not a secret, right-click the item and select Mark as Not Sensitive.
Enable or disable masking
Masking is enabled by default. To disable it and see all items in plain text, follow these steps:
- Go to Settings → Privacy.
- Disable the Mask sensitive content option.
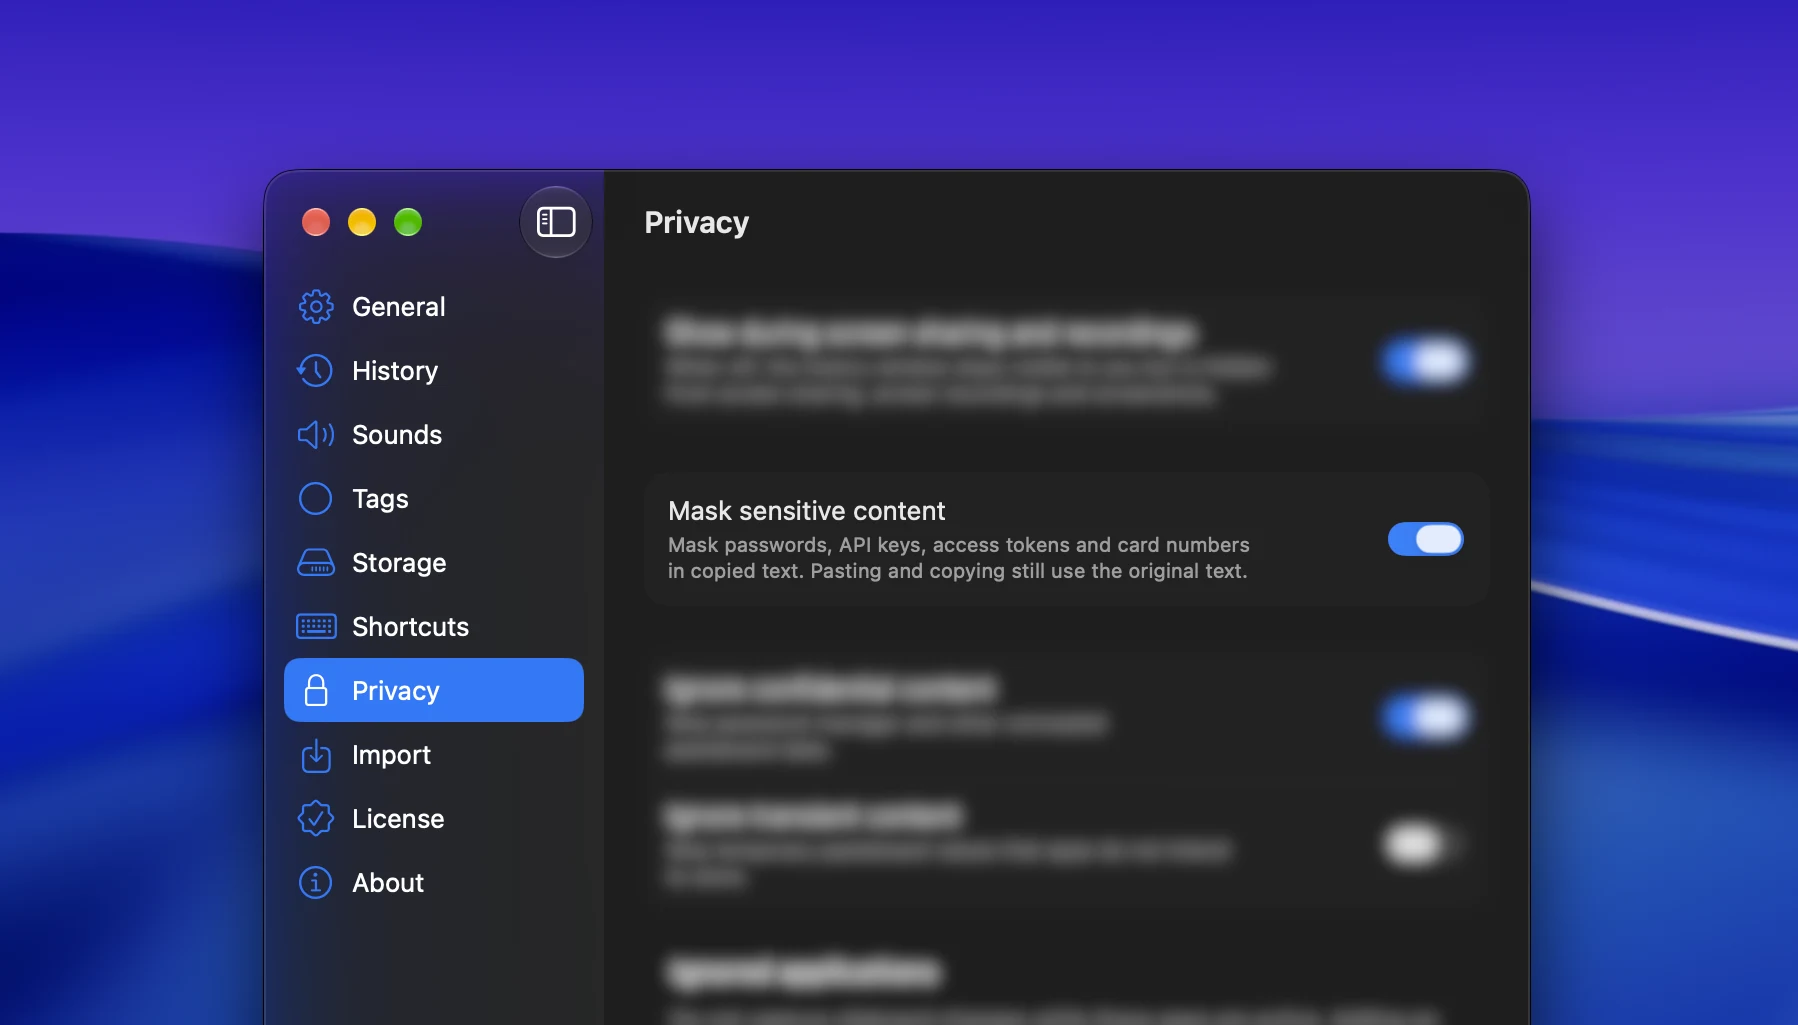
You can enable it again at any time.
This feature is available in ClipBook 2.3.0 and later.